Showing posts with label Barbara Ana. Show all posts

Tuesday, January 12, 2016

Blogging under the influence...

...of cold medicine! It's a snowy morning here in western Pennsylvania--actually our first real snowfall of the winter. So pretty outside, but, oh, how I wish I could just stay home today and stitch. Unfortunately, the real world of work and meetings and such calls and in spite of the fact that I have come down with a head cold that has swept through the entire library, I have to carry on as usual. Which, is why I took cold medicine last night (something I rarely give in to!) and I am feeling quite groggy and "out of it" this morning. Fortunately, I don't have to be at work until after noon today, so I have a few hours to "clear my head!" 

So, that is how my new year is starting out... How about yours? I've watched as many of you began the crazy challenges of starting new projects each day and just can't imagine how you keep track of everything. I am such a "one-project-at-a-time" stitcher which is why I also don't post as often as others. Sometimes, I just don't feel that I have much to share with you. Today, though, I am going to share some of the Christmas stitching I gave away to blogging friends... This post will contain the pieces I sent to my friends here in the United States and the lovely things I received from them. And next time, I will show you the pieces that were sent and received internationally. I am still waiting for one of them to arrive!

I stitched this Prairie Schooler ornament called "Christmas Eve Deer" for my friend Robin (no blog), in Virginia. I used 40 ct. Newcastle and DMC threads and changed many of the colors to those that were used in the earlier PS charts including DMC 221 and 520. The deer was changed to a much lighter color: 610--just didn't like him so dark in the recommended 3371. I also left off the border! Lots of changes, but I think the final ornament turned out so sweet!

Prairie Schooler "Christmas Eve Deer" finish

To my friend Myra, in North Carolina, went this miniature  Barbara Ana design that was featured in the November 2014 issue of "Cross Stitch & Needlework" magazine. It is stitched over one on 28 ct. black Monaco--I just love the tininess of it! And don't you love that chubby snowman just waiting to chuck a snowball at some passerby? The checked fabric that I used to finish it is from a kitchen towel that I picked up at a local craft store.  It is a nice weight and lends a cheery air to the finish, don't you think?

Barbara Ana design from CS&N November 2014 magazine


My friend, Cindy, in Tennessee, was the recipient of this darling snowman pair that I have stitched at least twice before. They just never fail to make me smile! The Val's Stuff design is from the 2010 Just Cross Stitch ornament issue and is called "Oh, Joy." As usual, I made some color changes and used DMC 221, 520, 844, 301, and B5200. This is also stitched "over one" on some mystery 28 ct. fabric and uses the same fabric from the kitchen towel as I used in the ornament shown above.

Val's Stuff "Oh, Joy!" finish

Cindy and I also share January as our birthday month and have exchanged gifts for years. This year, I sent her this cute Trilogy piece called "Happy Bunny Bunny Day" made into a little pillow. I have always loved this design and Cindy was very pleased with her gift. 

The Trilogy "Happy Bunny, Bunny Day" finish

I was delighted to receive packages from my U.S. friends in return! So many talented stitchers are out there--I am honored to be the recipient of your carefully stitched gifts!

From Robin, came not one, but two(!) darling Prairie Schooler ornaments along with some pretty pompom trims which will come in very handy with my next round of ornament finishing. Thank you so very much, Robin! Your beautifully stitched gifts made me smile :)

Christmas gifts from Robin

From Myra, came a box just jam-packed full of wonderful goodies including homemade pillowcases in the beautiful deer/cardinal winter themed fabric that you see below, a tiny cloth bell ornament, a wee zipper pouch that will be most handy when I travel or to clip on to my stitching bag (it is a perfect size for needles), some lotions, a jar of caramel pear butter, and a nice supply of candy canes. Thank you so much, my friend--I just love everything!

Christmas gifts from Myra

From Cindy, came this cheerful Lizzie Kate ornament, some snowflake fabric and two charts. I'm sure my youngest son would love it if I stitched that hockey playing PS Santa for him some day! Thank you, Cindy, you were so sweet to remember me after the difficult year you've had. Your gifts are beautiful!

Christmas gifts from Cindy


And another unexpected gift flew in from California! I lent Annette a chart a few months ago and to thank me she sent a beautiful needlebook (all done up in my favorite colors of blue and white!), two skeins of silk thread, and a charming hand-made Christmas card. What a wonderful surprise, Annette! You were so sweet to spoil me--your needlebook will come in very handy and is perfect for this time of year with its sparkly fabric. It mimics the sparkly snow that is falling outside as I write this! Thank you again for thinking of me...

Thank you gifts from Annette

I have to say, that it feels good to get the house back to "normal" after all of the Christmas festivities. It was hard to take the ornaments off my tree and put them to "bed" for the year. Thank you all so much for your wonderful comments about my Christmas tree in my last post. They meant so much to me! Here are all the little beauties nestled into their acid-free box just waiting to greet me next December...

Piles of Christmas ornaments just waiting for next year!

I still have more Christmas ornaments to share with you that were sent and received from my international friends, but that will have to wait until my next post. Right now, I have to run and shower and head off to work. My head is beginning to feel less groggy since I began writing this so at least I can drive safely now that the cold medicine has worn off. I have the rest of the week off after today so I'm sure I'll get well-rested and be back to my normal self the next time I post. But, there will be one big change--I will be a year older. Yep, I turn 61 on Saturday. Sigh... That sounds very old to me!

I do hope this will be a healthier year for my family. When my husband broke his neck last May, it clouded much of our year with worry and uncertainty. I actually think many of the health issues I faced were rooted in my anxiety over his recovery. But, 2016 is a new year and I am so hopeful for better days... I wish you the same!  Bye for now...

A snowy day here in Pennsylvania...

Thursday, January 29, 2015

Christmas gifts and finishing tips


Good morning--and happy end of January! Did you all survive the month in good shape? I always think January days seem endless with their gray and chilly skies; I can't say I'm sorry to see the month coming to an end. But, the bright spot smack-dab in the middle of January was my 60th birthday and I want to thank each of you for helping make it a day of celebration for me! Your comments on my last post, the cards, the emails, the gifts--you certainly made turning 60 a fun (and much less painful than I thought it would be!) experience... 

I'm finally showing you the remaining ornaments that I stitched and sent for Christmas gifts. Some of you have asked how I had the time to stitch 11 gifts in the busy month of December... Well, the truth is, I try to stitch these little presents throughout the year and tuck them away to finish for Christmas gifts. But, I found myself feeling very stressed with all that finishing in December so this year I'm trying to "finish as I stitch" and then when Christmas rolls around, I'll be much better prepared. I showed you the five gifts that went out to some of my international friends in this post, so the following were sent to friends here in the United States. As alway, I'd love to hear which one you like the best!

To Robin (no blog), in Virginia, went this cute Barbara Ana design which is featured in the September 2014 issue of "Cross-Stitch & Needlework" magazine. Barbara Ana designed nine tiny Christmas/winter scenes for the September 2014, November 2014, and January 2015 issues. I fell in love with this one and knew I had to stitch it "over one" on 28ct. black Monaco and finish it as one of my little pillow ornaments. Isn't it sweet? I did change some of the colors to more of a Prairie Schooler palette. For the hanger, I simply fringed some of the same fabric that I used on the bottom and back of the ornament. I know I'll be making this again for myself!


I have previously stitched this snowflake ornament which I sent to Mary, on the other side of Pennsylvania, for myself and my finish seems to pop up all over Pinterest. The good news is that it is a freebie that is still available right here so you can stitch it for yourself. As with the finish I did for my own Christmas tree, I used DMC 115 and 40ct. white Newcastle linen. The ruched gingham ribbon adds such a nice touch to the finish--simple and classic. I know I'll be stitching this again for future gifts... perhaps in different colors.


Another Prairie Schooler ornament that you've seen a few times on my blog was sent to Shirlee, in Kentucky. In fact, this is the fourth time I've stitched it, so you know I must really like it! Unfortunately, I have yet to keep one for myself--I'll have to work on that...  This was stitched on 32 ct. sage Jobelan using the suggested DMC colors. The chart can be found in Prairie Schooler's "A Prairie Year II" (Book No. 23).


My friend, Jackie, in Texas was the recipient of this cute JBW piece called "A Very Merry Winter." If it looks familiar, that's because I stitched it last year for another friend and also received this same design as a Christmas gift from my friend Lois a few years ago.  I love how the snowman's body spells out "Have a Very Merry Winter" and the rusty bells on the bottom are a finishing idea I stole from the ornament Lois sent to me. Isn't it great how we all gain inspiration from each other?


My final finish traveled to North Carolina to a new home with my friend, Myra. I stitched just a portion of Prairie Schooler's Christmas Samplers (Book No. 63) in a finish I had already done for myself back in the 2010. I used the same linen and threads for Myra's ornament as I did for mine which you can read about right here. I did finish them differently and I can spot some improvements I've made over the past five years in my finishing process.  Here is the one I made for Myra:


And here is the one I made for myself in 2010:


FINISHING TIPS I've learned through the years... Now, they are both cute finishes, but do you notice how the newer finish is smoother and less "lumpy" looking than the one done in 2010? That is because I've learned what a huge difference using interfacing can make in the final look of your ornaments. Back in 2010, I didn't use it, but for the past few years it's been a vital step in my finishing routine. I purchase Pellon P44F interfacing from Joann Fabrics whenever they have a sale. It is fusible and very easy to apply--in fact, I found this very helpful tutorial for you right here. I apply the interfacing to both the front and the back of the ornament fabric--just think it gives it a nicer appearance and firmer feel.

More tips...  Some of you have asked what filling I use in my little pillow ornaments. I've used "A Touch of Silk" fiberfill for the past few years and love it! It is also available here at Joann Fabrics. I really stuff it well--push it into the far corners and then just keep pushing it in, layer upon layer. I use a lot more fiberfill today than I did when I made the older ornament and it makes a huge difference in the feel and look of the finished piece. When I am done filling it (but before sewing up the opening), I turn the ornament over (stitching side down) and really give the back side a good pressing with a hot iron (protect your fabric with a pressing cloth if you are worried that it won't hold up to a hot iron). I don't know if this melds some of the fiberfill together, or what, but the finished result is a nice dense feeling and not-so-puffy ornament. If you had me close my eyes, then held out my older ornaments and my newer ones to me and asked me to tell you which one was which, I guarantee I could do it just by feel... The amount of fiberfill and the pressing have made that much of a difference!

A few other tips... I've had many of you email asking about my cording. As you know, I love adding cording--not only around an ornament, but also as a little accent across the joint between the stitching and accent fabrics. Although there are many ways to make cording (using a drill, an electric mixer, etc.) I choose to use the Kreinik Custom Corder. It is very affordable and actually fun to make! And then, I glue (yes, I can hear a few of you gasping in horror!) the cording to my finished ornament. I simply go very slowly--I mean VERY SLOWLY!!! Do not glue the entire ornament edging at one time. I put a bit of glue on the end of a toothpick and apply it sparingly to about half of one side of the ornament. Once that has taken hold, I move on, slowly doing the rest, bit by bit. The glue I use is Aleene's Original Tacky Glue. I'm sure there are many others that work just as well--that is just what I happen to prefer. The trick to it not oozing out and showing under your cording is to just use the slightest bit--a little goes a long way.

One last tip--I use invisible thread to stitch the sides of my pillow ornaments closed. Yes, it is a bit fiddly to work with, but there is never the problem of a finding a matching spool of thread to sew up your ornament with.

I am, by no means, a professional finisher--I just wanted to share with you a few things that have helped me become a better ornament finisher than I was five years ago. Most of you probably already know/use these things, but I'm sure there are a few of you who are just beginning to finish your stitching into pillows and ornaments. Many of you email me with questions and I'm hoping that the above tips will help a bit... This was not meant to be a tutorial on how to finish--there are many excellent ones out there already:  Vonna's finishing site and Pinwheel Ponders are just two that I've regularly used. But, these are just a few of the tips that have worked for me. Good finishing takes a long time--honestly, I'm embarrassed at how long I spend on some of my ornaments. But, I love making them and want them to be special so I really try to put some thought into choosing complementary fabrics, trims, and accents.

Now, I said I sent out six ornaments to U.S. friends, didn't I? And there are only five pictured (not counting my "old" finish from 2010)... Well, the truth is I loved that sixth ornament so much that I'm making it again for myself for one of my monthly ornaments so I"ll wait to show it to you in February...

60th birthday memories... I had such a nice birthday even though I spent much of the actual day on the phone talking to friends and relatives (I'm not one who enjoys talking on the phone very much!). And then that evening, my husband took me out for dinner at one of our favorite local restaurants. Being the middle of January, the weather was frigid and icy, but we were seated right next to the fireplace in a cozy corner--it couldn't have been nicer. That Sunday, my two older sons came over and baked homemade pizzas for us and gifted me with two certificates to 123 Stitch (thank goodness, because I got no stitchy gifts from my family for Christmas--they said they didn't want to "feed my addiction!" Addiction??? Me??). My  youngest son sent this beautiful basket of blue hydrangeas which have continually brightened my kitchen table for the past two weeks.
 
Birthday flowers from my youngest son
 
My husband bought me a lovely silver bracelet and the most decadent chocolate cake. I think it was the prettiest cake I had ever received--the sides were all covered with chocolate curls!  And I'm happy to say, that so far anyway, life in my 60s is going quite well!

60th birthday cake--chocolate decadence!

I also received a few more birthday gifts from blogging friends... Myra sent this quilted table mat--isn't it gorgeous? I can already picture a cute patriotic display in my new corner cupboard using your mat, Myra! Along with the mat, she sent a couple of notepads and a striped towel that I can stitch on. Thank you so much, Myra--your gifts are wonderful!

Gifts from Myra

Lois sent a package of goodies all the way from Northern Ireland. She stitched this adorable snowman fob for me and include four lovely finishing fabrics and the cute Lizzie Kate Snow kit along with it. I just love everything you chose for me, my friend--you know me well! Thank you, Lois...

Gifts from Lois

And all the way from France, and my friend, Nathalie (no blog), came this blue wool scarf with a pretty wintery scene and two little bunny ornaments to put me in the mood for spring. Nathalie thought she remembered that I love anything bunny related and she was right! Thank you so much, Nathalie--your gifts made me smile :)

Gifts from Nathalie

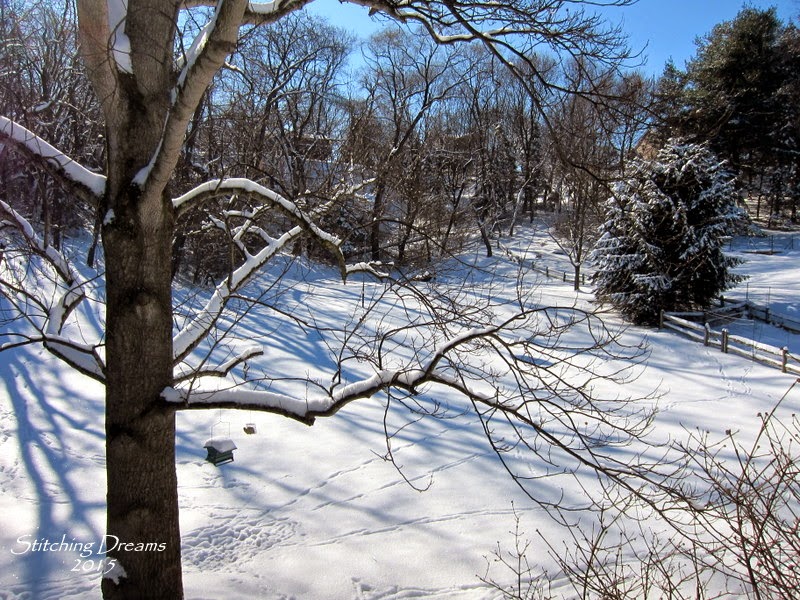
Western Pennsylvania got very lucky as we were only on the outer edge of the latest blizzard to hit the northeast U.S. We  got about 7" of the white stuff this week and it was absolutely beautiful--the kind of snow that looks like icing on every branch and twig. I took a few photos of our backyard yesterday as it was an unusually sunny, blue-sky type of day...


I never intended to write a post of this length--I hope at least a few of you are still awake!! I just thought you might like to know what has helped me become a better finisher over the past five years... Even if you just gleaned one useful tip from this post, I'm happy to have helped.  Happy February everyone--and thank you, as always for your friendship and your great comments and emails! Bye for now...